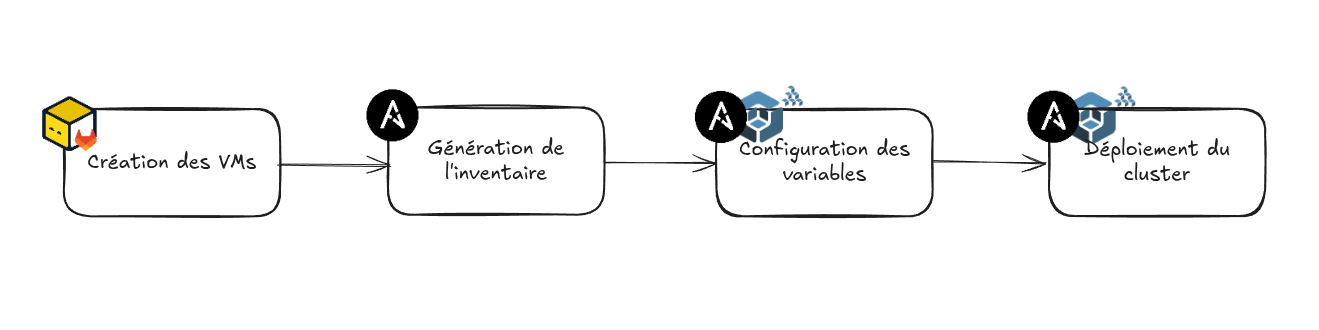
Introduction
In my homelab, I wanted to take automation further by deploying a complete Kubernetes cluster on Proxmox, relying on infrastructure as code and automation tools such as Ansible. The goal was to be able to quickly provision a reproducible k8s cluster, ready to host workloads, while keeping control over every step of the deployment through code. This progression naturally led me to Kubespray.
Context
After first installing a Kubernetes cluster manually with kubeadm, I found the process particularly tedious. That experience convinced me of the need to automate and standardise the deployment, to gain reproducibility and efficiency.
This is where Kubespray comes in: this open source project provides ready-to-use Ansible playbooks to install, configure and maintain a Kubernetes cluster with a 100% as code approach. Unlike kubeadm, it offers fine-grained control over the cluster components (CRI, CNI, DNS, etc.) while remaining automated and reproducible. In this article, I describe the approach I followed, the technical choices I made and the tools I used to reach this goal.

Kubespray logo
Prerequisites
Before starting the deployment, you need the following resources:
Infrastructure:
- At least 24 GB of RAM available on the Proxmox hypervisor
- 150 GB of free storage
- Network access with static IP assignment
- An SSH key to access the VMs
Components
- Proxmox 8.X+: provides the infrastructure to run and manage virtual machines.
- Ansible 2.16+: the automation tool used by Kubespray to deploy and configure Kubernetes.
- Terraform 1.10+ & Packer 1.12+: to automate the creation and configuration of the VMs.
Target cluster architecture
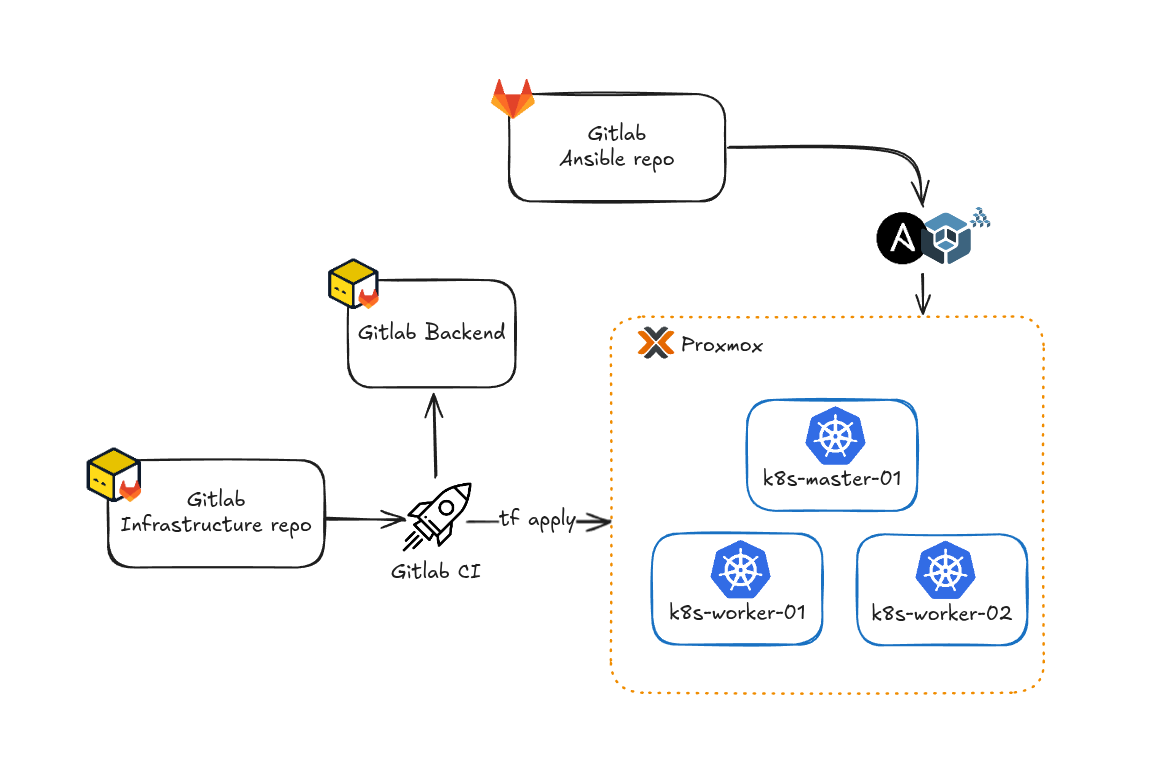
The cluster is made of three nodes with the following sizing:
| Role | Hostname | vCPU | RAM | Storage |
|---|---|---|---|---|
| Control Plane | k8s-master-01 | 4 | 8 GB | 50 GB |
| Worker Node | k8s-worker-01 | 4 | 8 GB | 50 GB |
| Worker Node | k8s-worker-02 | 4 | 8 GB | 50 GB |
Target architecture
Creating the VMs
For my homelab, I went for a simple architecture made of three VMs: one control plane and two worker nodes.
There are several reasons for this choice:
- Simplicity for learning: with three nodes, the cluster stays simple to manage while still allowing you to try most Kubernetes features (load balancing, pod affinity, fault tolerance, etc.).
- Worker fault tolerance: two workers make it possible to test node failure scenarios and observe how Kubernetes behaves when rescheduling pods.
- Resource control: this sizing stays reasonable in terms of resources consumed (4 vCPU, 8 GB RAM, 50 GB storage per VM), which matters in a homelab.
NoteHigh availability: this architecture has a single control plane. For real high availability in production, you would need at least 3 control planes (an odd number for the etcd quorum) with a load balancer in front of the API servers, or dedicated etcd instances outside the cluster. For this homelab, a single control plane is enough for learning and experimenting.
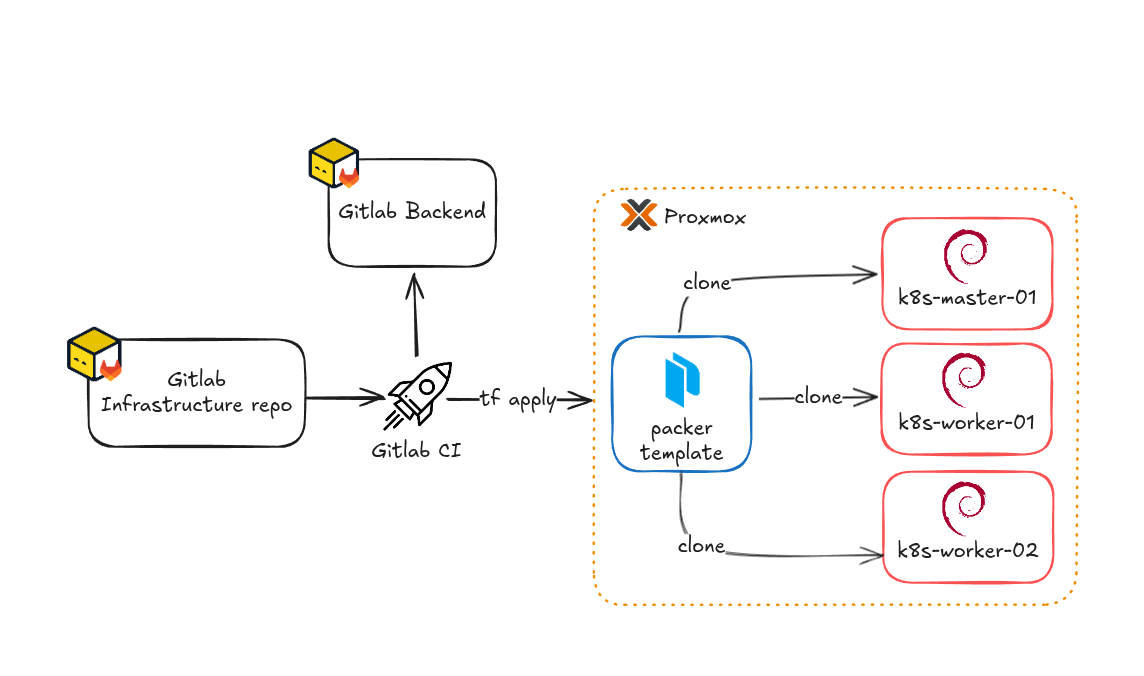
With the sizing defined, let’s create the VMs. For this, I used Terraform and Packer, which lets me deploy my infrastructure quickly and in a fully automated way. I explain this approach in detail, in particular building Proxmox templates with Packer and deploying them with Terraform, in my article on Proxmox templates with Packer.
| |
Once the Terraform code is applied, the three virtual machines are deployed on Proxmox. Each VM gets one or more of these tags: (k8s_cluster, kube_control_plane, etcd, kube_node). These tags make it easier to generate the Kubespray inventory, which I describe further down in the article.
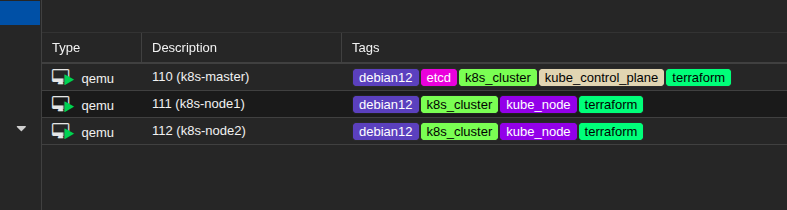
VMs in Proxmox
Network configuration and SSH access
Thanks to Cloud-Init during the VM creation process (through the Packer template and the initialization argument of the proxmox_virtual_environment_vm resource of the Terraform provider), the network configuration and SSH access are automated:
- Static IP address: each VM gets its static IP directly at deployment, defined in the Terraform
ip_configsection. This avoids any manual configuration after deployment. - SSH key: the public SSH key is injected automatically into each VM through Cloud-Init, which allows an immediate connection without copying the key by hand.
This process makes it possible to manage all the VMs with Ansible as soon as they are created, without any further manual step. In my case, I can therefore use the Kubespray playbooks directly.
WarningIn a production environment, it is recommended to manage secrets (Proxmox API tokens, SSH keys, etc.) with dedicated tools such as Ansible Vault or external secret managers.
The resources are now ready and configured, we can move on to setting up the Kubernetes cluster with Kubespray.
Setting up Kubespray
Cloning and configuring the Kubespray repository
I added Kubespray to my project as a git submodule. This lets you include another repository while keeping its history separate. It makes dependency management easier and lets you track a specific version of Kubespray, update it easily, and follow the project’s changes without mixing source code.
| |
To pin the submodule to a specific tag or commit, go into the submodule directory and check out the desired commit or tag. Then go back to the main project directory, commit the changes and push them.
| |
Pinning the Kubespray version is important to guarantee reproducible deployments and avoid any instability caused by uncontrolled changes in the upstream project.
Once the Kubespray project is integrated and configured in the Ansible repository, we can move on to generating the Kubespray inventory.
Creating the Kubespray inventory
For the Ansible inventory used by Kubespray, I chose the Proxmox dynamic inventory. This gives an inventory that is always up to date, since it is loaded at every playbook run, which avoids maintaining the inventory file by hand.
| |
The inventory above retrieves all the VMs in Proxmox, groups them by their proxmox_tags_parsed tags and sets the ansible_host variable of each inventory entry to the IP of each VM.
For Kubespray, the tags must follow the naming described in the documentation, because that is what runs the playbooks on the right hosts.
To generate the inventory, I use the command below, where the --graph option makes the output a bit more visual, to clearly tell apart the groups and hosts of the Ansible inventory.
| |
In my case, this gives the following result:
| |
Once the inventory is in place, I can test the connectivity of the VMs with the ad hoc command below, which uses the Ansible ping module:
| |
Which gives the following result:
| |
Now that I have the Proxmox dynamic inventory and reachable virtual machines, I can move on to customising my K8s cluster.
Customising the variables
To customise the Kubernetes cluster, you go through Ansible group_vars. These variables let us configure various aspects of the cluster, such as:
- Kubernetes settings (kube version, internal network, DNS, …)
- Container Runtime Interface (CRI)
- Container Network Interface (CNI)
- Container Storage Interface (CSI)
- ETCD configuration
- Addons and optional components (ArgoCD, Helm, cert-manager, MetalLB, …)
- And much more…
These variables are spread across several inventory files to better structure the configuration:
| |
For more information about the possible cluster configuration and the available components, refer to the Kubespray documentation.
NoteIn this article, I mostly use the default configurations provided by Kubespray. The goal is to show the deployment process rather than justify specific technical choices for each component (CNI, CRI, etc.). These choices can be adapted to the specific needs of each project.
The target configuration of the Kubernetes cluster is defined, the next step is the deployment!
Deploying the Kubernetes cluster
Before running the deployment with Ansible, I need to set up my environment. To do this, I use a Python venv to pin the version of Ansible and of my dependencies, so that everything is isolated and potential conflicts with other projects are avoided. The venv also gives a reproducible environment, which is crucial to run deployments identically.
| |
Once the environment is ready, it is finally time to deploy the cluster, by running the cluster.yml playbook with the Proxmox dynamic inventory configured earlier.
| |
Once the playbook has finished, the Kubernetes cluster is ready to use with the configuration defined above.
| |
Checking the cluster
Once the deployment is complete, it is essential to check that the Kubernetes cluster is operational and that all components work correctly. Several kubectl commands let you validate the state of the nodes and pods.
To check the state of the cluster nodes:
| |
Result:
| |
All nodes must be in the Ready state, which means they are ready to run workloads.
To make sure all pods are running, use the command:
| |
Result:
| |
All pods must be in the Running state. This guarantees that the cluster components are correctly deployed and working.
These checks confirm that the Kubernetes cluster is ready to host workloads and that the essential services are up.
Result
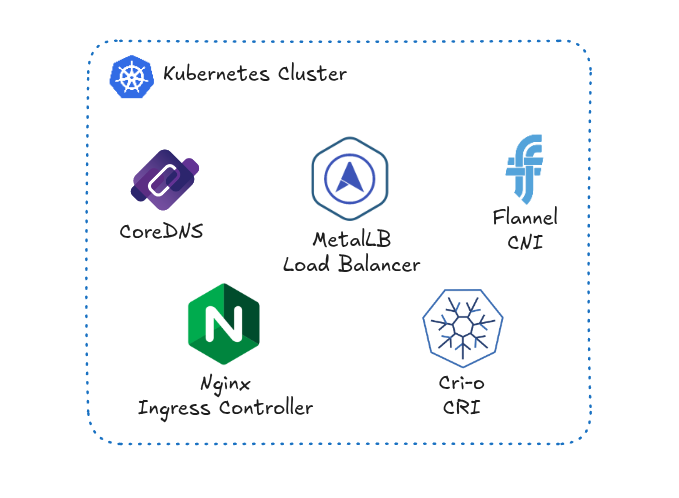
Kubernetes cluster after deployment
Post-deployment operations
Lifecycle management
Kubespray is not limited to the initial deployment, it also provides playbooks to manage the full lifecycle of the cluster:
Adding nodes:
| |
Upgrading the cluster:
| |
Full reset:
| |
Conclusion
Automating the deployment of a Kubernetes cluster with Ansible through the Kubespray project brings reliability, speed and reproducibility, which is essential for me in my homelab.
Thanks to the dynamic inventory and the Ansible variables, it is easy to adapt the cluster configuration to my needs, while keeping control over each component. This approach also makes maintaining and evolving the k8s cluster easier, since everything is done as code and Kubespray also provides playbooks to add a node to the cluster (scale.yml) or even reset the cluster (reset.yml).
Workflow